You can use either a computer with a RJ45 Ethernet port, either an USB Ethernet Adaptor such as this one [here](https://www.tp-link.com/ro/home-networking/computer-accessory/ue300/).
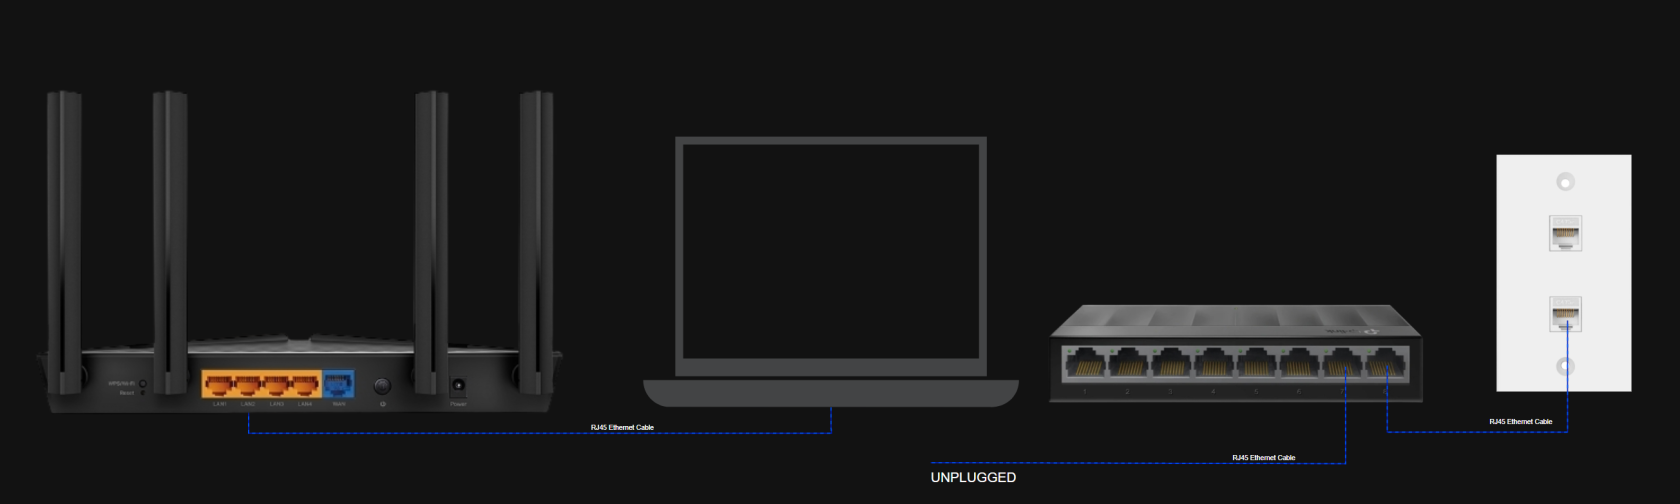
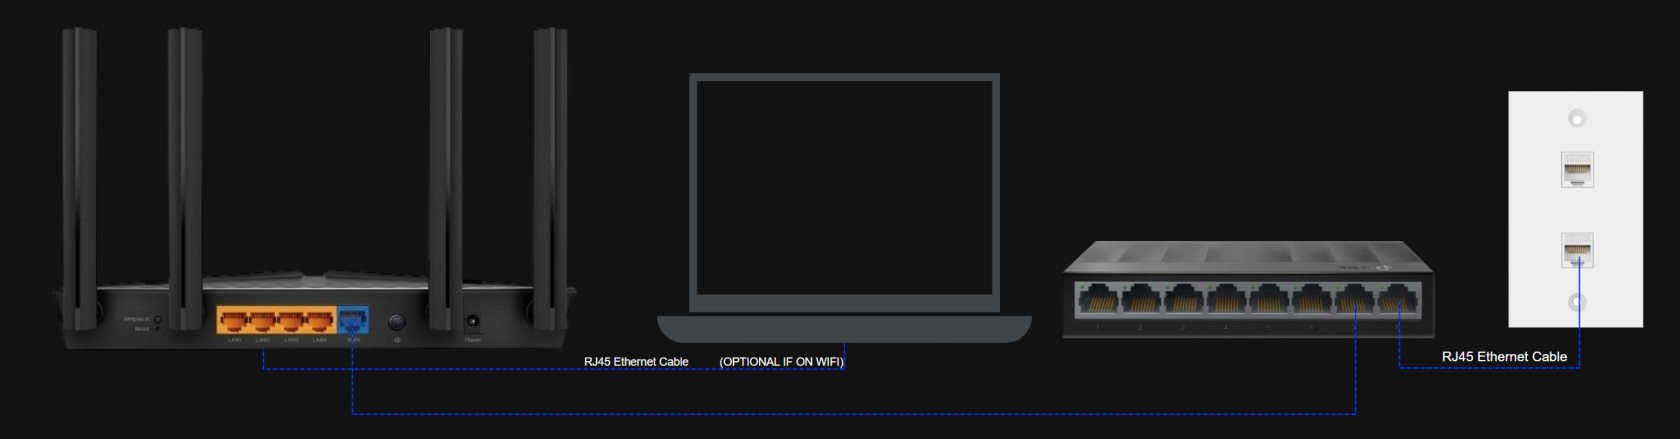
##### **Initial Connection Diagram** [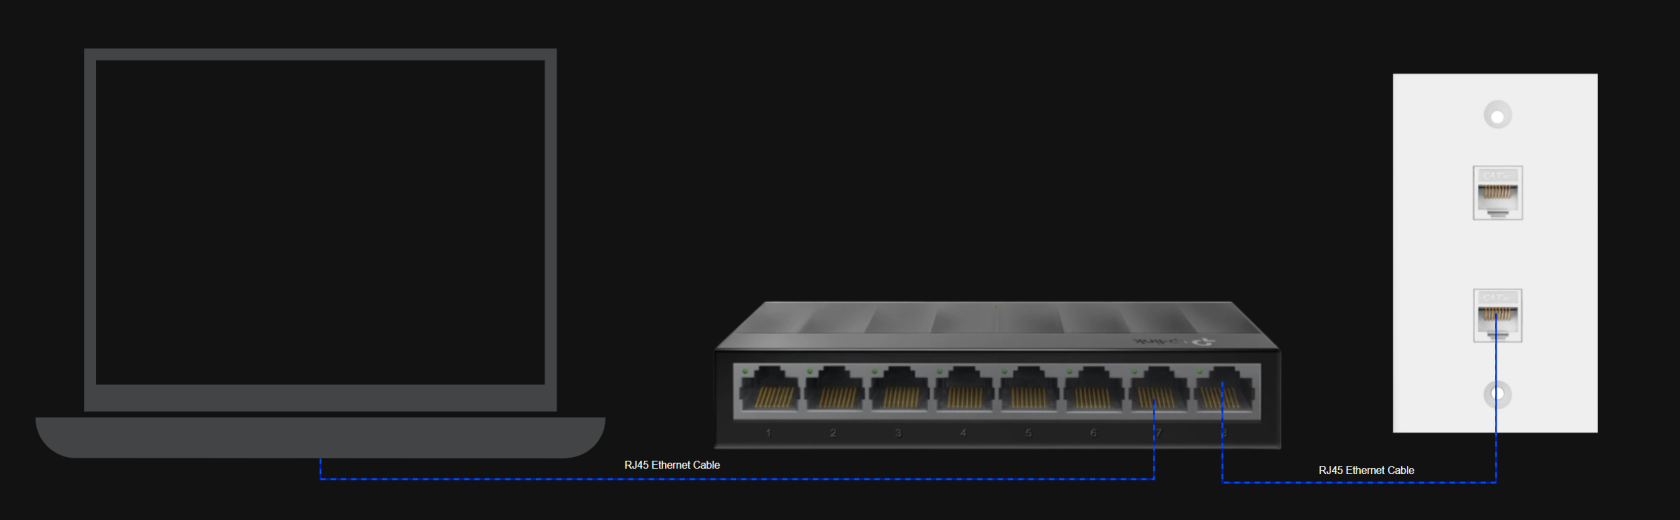](https://docs.ciurix.ro/uploads/images/gallery/2025-09/Wwlimage.png)**Please proceed only when you have finished the initial wiring as shown above!**
##### **Connection Setup** **The dorm network uses **802.1X authentication**. For this to work, you must enable the **Wired AutoConfig** service:** Press `Win + R`, type `services.msc`, press **Enter**. [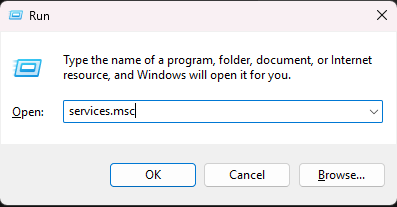](https://docs.ciurix.ro/uploads/images/gallery/2025-09/YNSimage.png) - Scroll down and find **Wired AutoConfig**. - Right-click → **Properties**. - Set **Startup type** = **Automatic**. - Click **Start**, then **OK**. [](https://docs.ciurix.ro/uploads/images/gallery/2025-09/mmc-iwjhpupurl.gif)Without this, your PC will not be able to authenticate with the dorm network.
Press `Win + R`, type `ncpa.cpl`, press **Enter**. [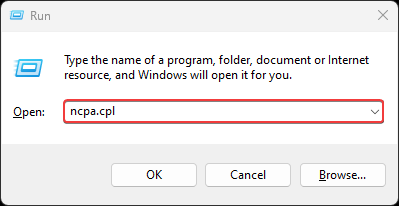](https://docs.ciurix.ro/uploads/images/gallery/2025-09/D7limage.png) In the list of adapters, **right-click your Ethernet adapter** → **Properties**. [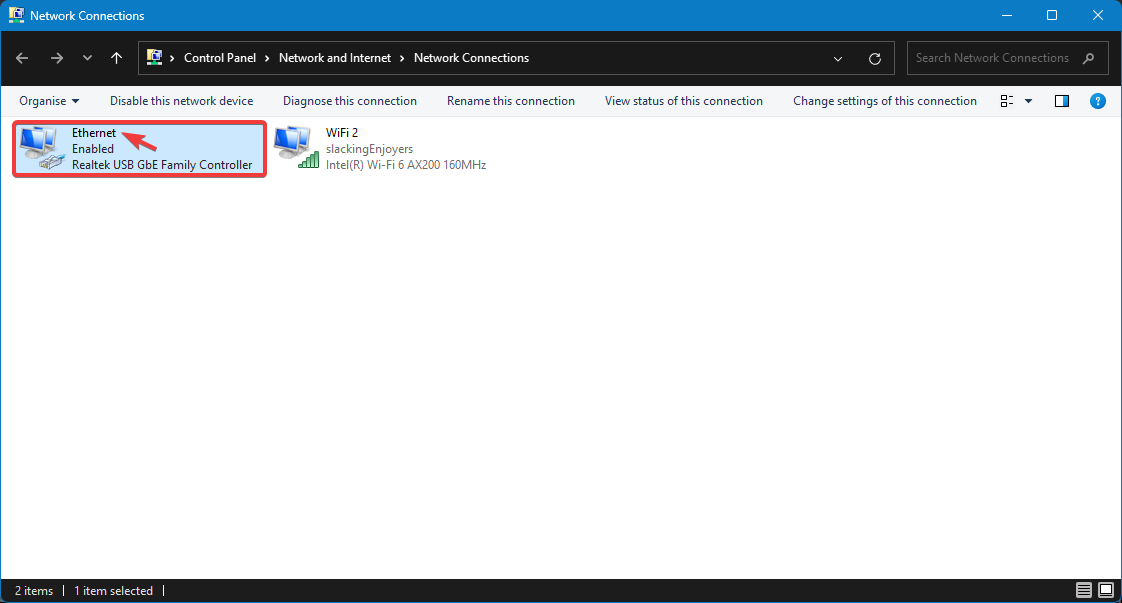](https://docs.ciurix.ro/uploads/images/gallery/2025-09/7fMimage.png) [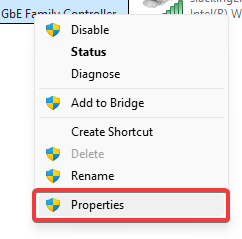](https://docs.ciurix.ro/uploads/images/gallery/2025-09/cwlimage.png) Tick **Enable IEEE 802.1X authentication**. **Choose network authentication method:** `Microsoft: Protected EAP (PEAP)`. [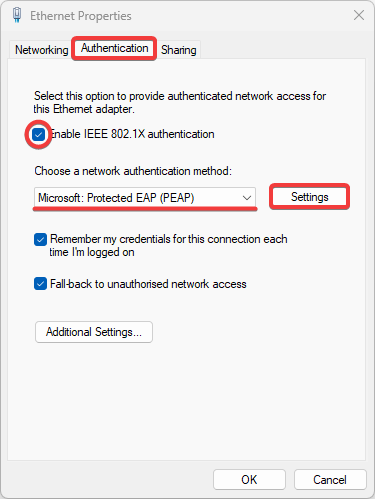](https://docs.ciurix.ro/uploads/images/gallery/2025-09/eOAimage.png) Click **Settings** → make sure **Validate server certificate** is **not** checked. For **Authentication Method**, select **Secured password (EAP-MSCHAP v2)**. [ 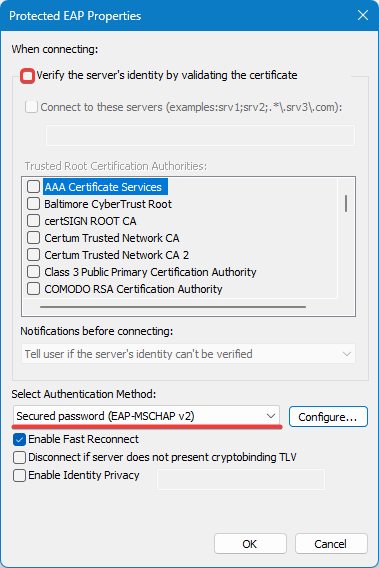](https://docs.ciurix.ro/uploads/images/gallery/2025-09/OWTimage.png) Click **OK** to close the current window. [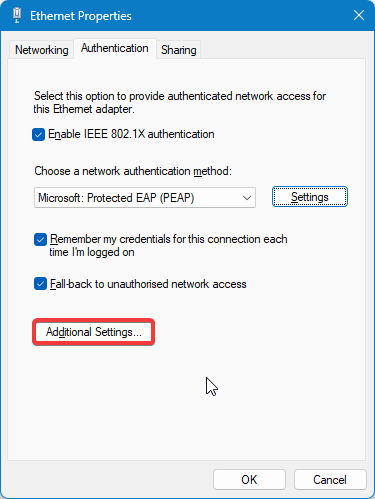](https://docs.ciurix.ro/uploads/images/gallery/2025-09/HFTimage.png) At **Specify authentication mode**, select **User authentication**. Click **Save credentials** [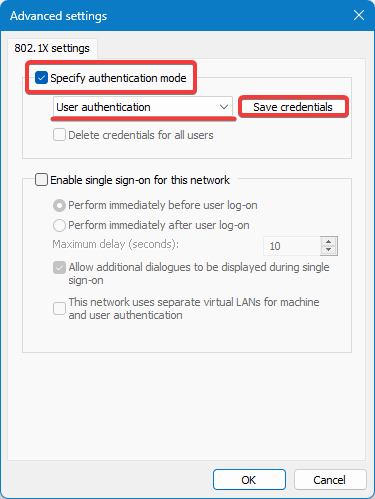](https://docs.ciurix.ro/uploads/images/gallery/2025-09/leEimage.png) Enter your username and password provided to you in my.upb.ro such as the following email:
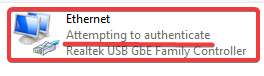
You should now see the Ethernet adapter trying to authenticate with the dorm network.
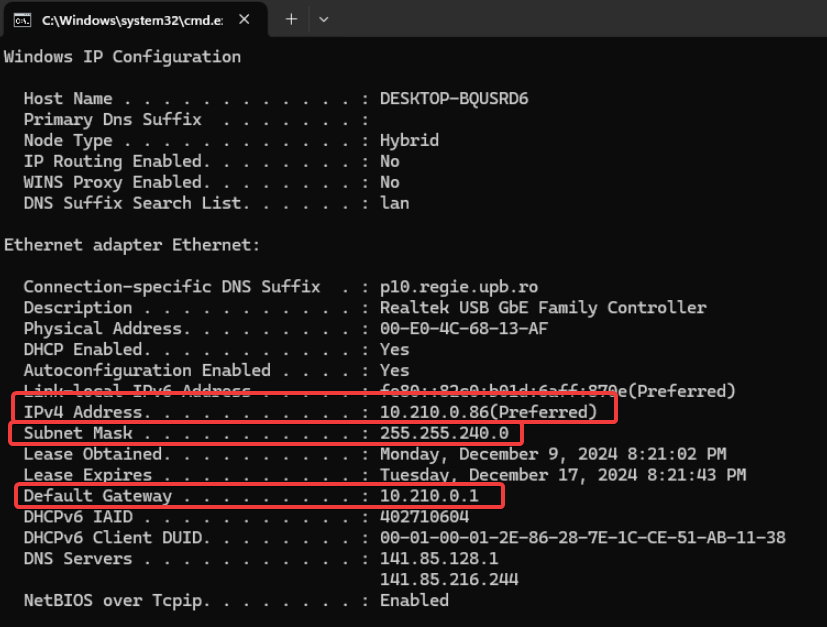
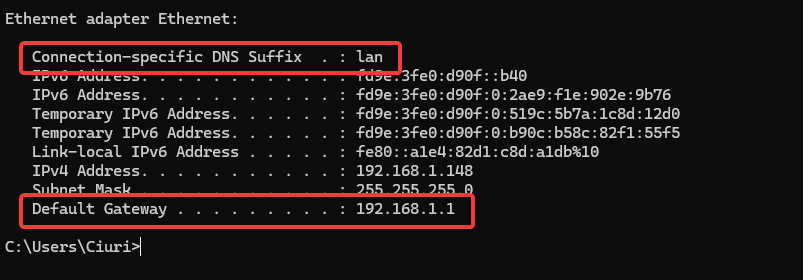
[](https://docs.ciurix.ro/uploads/images/gallery/2025-09/3pDimage.png)In order to start the router setup, you need to gather all the information provided by the dorm network. Example: **DO NOT USE THESE! - Use the ones you have in your case.** IP Address: 10.210.0.86 Subnet Mask: 255.255.240.0 Default Gateway: 10.210.0.1 Physical Address: 00-E0-4C-68-13-AF (also referred as MAC Address)
Press `Win + R`, type `cmd.exe`, press **Enter**. Type `ipconfig`, press **Enter**.Look for the following information stated in the Ethernet adapter:
[](https://docs.ciurix.ro/uploads/images/gallery/2025-09/Uggimage.png) In order to access your router setup page, you will either need to connect to WI-FI or connect your computer to one of the LAN ports of the router.**This step is *OPTIONAL* if you have a WI-FI connection!**
Whatever you do, **DO NOT UNPLUG** the RJ45 cables from the switch! This will break the authentication and you will have to repeat the whole procedure.
[](https://docs.ciurix.ro/uploads/images/gallery/2025-10/image.png)Now that you are successfully connected to the router, we can look for the router IP address. (the Default Gateway, in my case, 192.168.1.1)
While in the same window of `Command Prompt` or `cmd.exe`, now being connected to the router you should see a different output of `ipconfig`.Depending on your connection type, either by cable or by using WI-FI, your place will differ. The IP you are looking for should start with 192.168.x.x or 10.x.x.x! Remember to look for **Default Gateway** not IPv4 Address.
[](https://docs.ciurix.ro/uploads/images/gallery/2025-10/fKcimage.png) Open up a browser of your choosing and navigate to the router setup page, in the following example is 192.168.1.1, but you should use the one you have saved earlier from ***Default Gateway***. [](https://docs.ciurix.ro/uploads/images/gallery/2025-10/MsBimage.png)In my example, I am using an older router but my recommendation would be an TP-Link Archer AX23 v1 or v1.20 for better upgradability (also labelled as AX1800).
You will be prompted to login with a username and a password *(or for newer models, only a password).* ***Please look for that information on the bottom of your router.*** [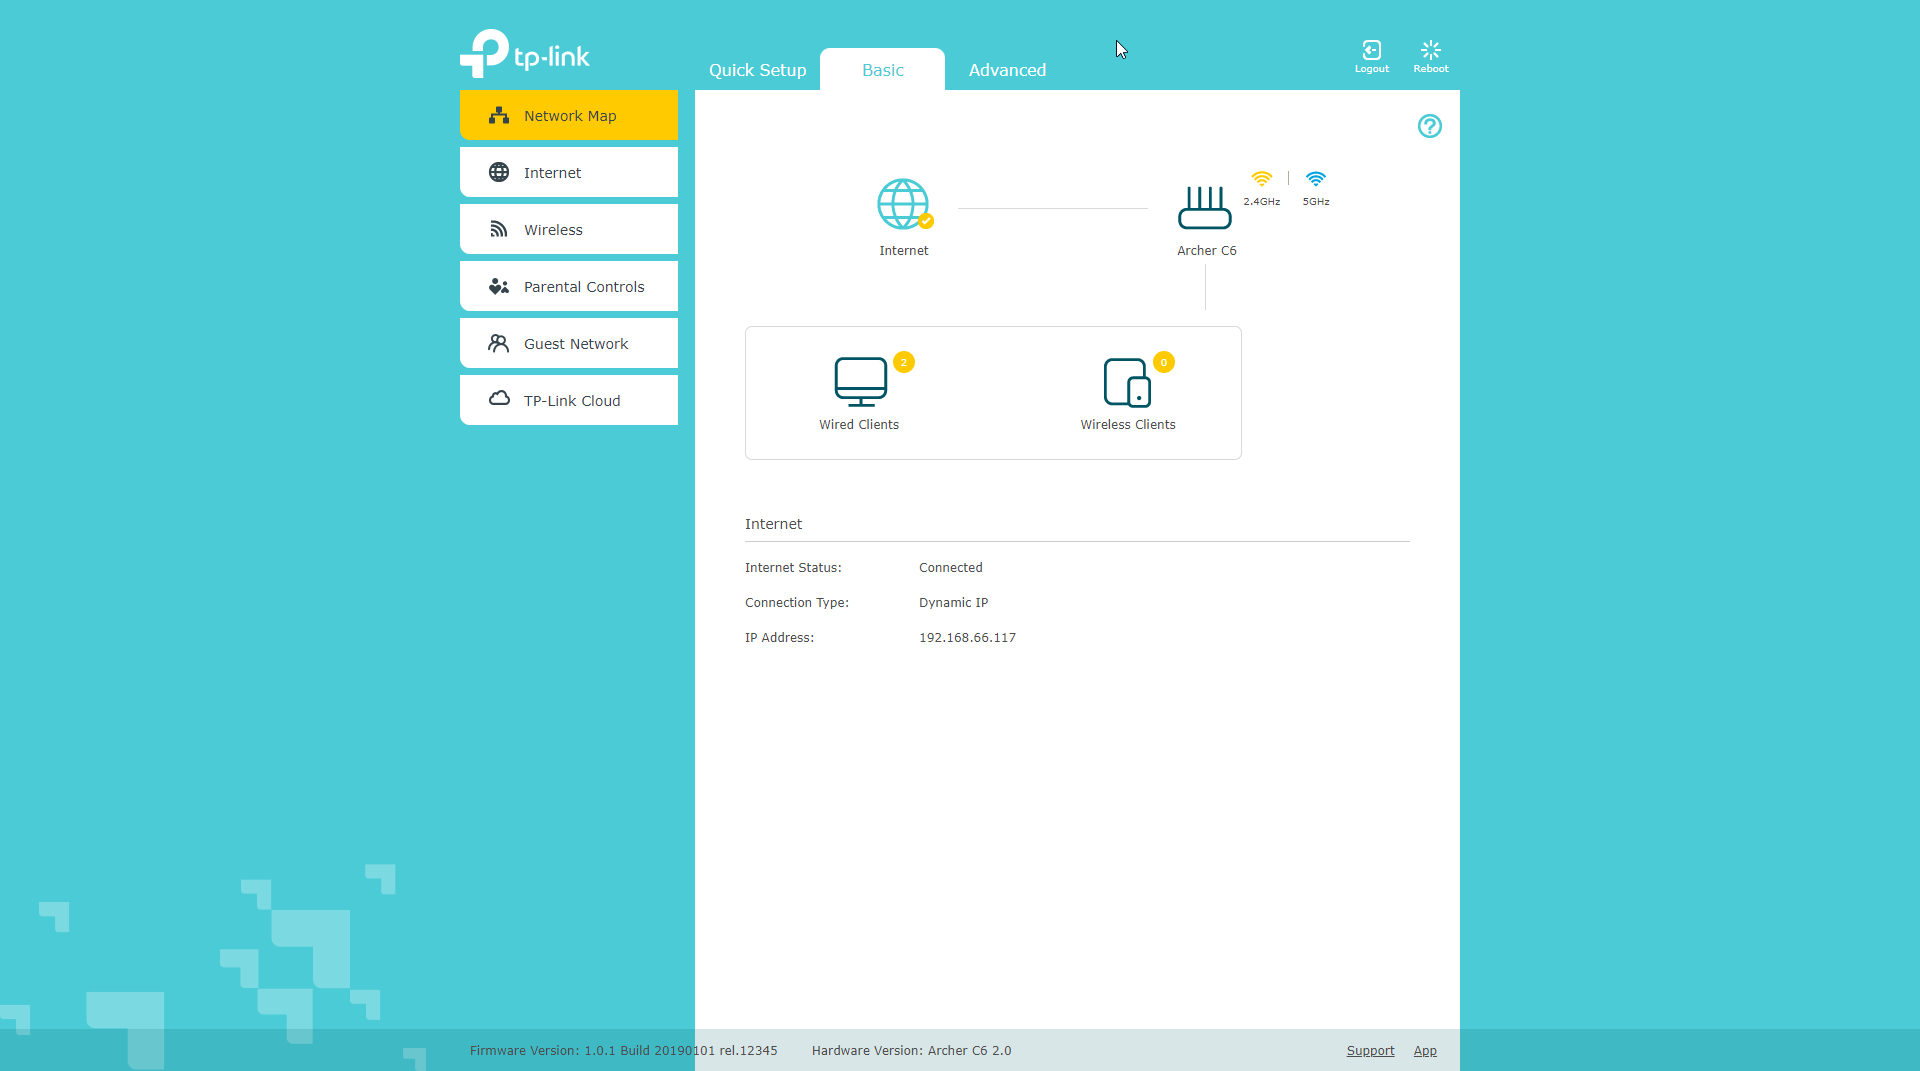](https://docs.ciurix.ro/uploads/images/gallery/2025-10/Pgfimage.png) Once on this page, navigate to the **Advanced** section of your router and in the **Internet** settings tab and fill out the previously gathered information from ipconfig as shown in the picture. [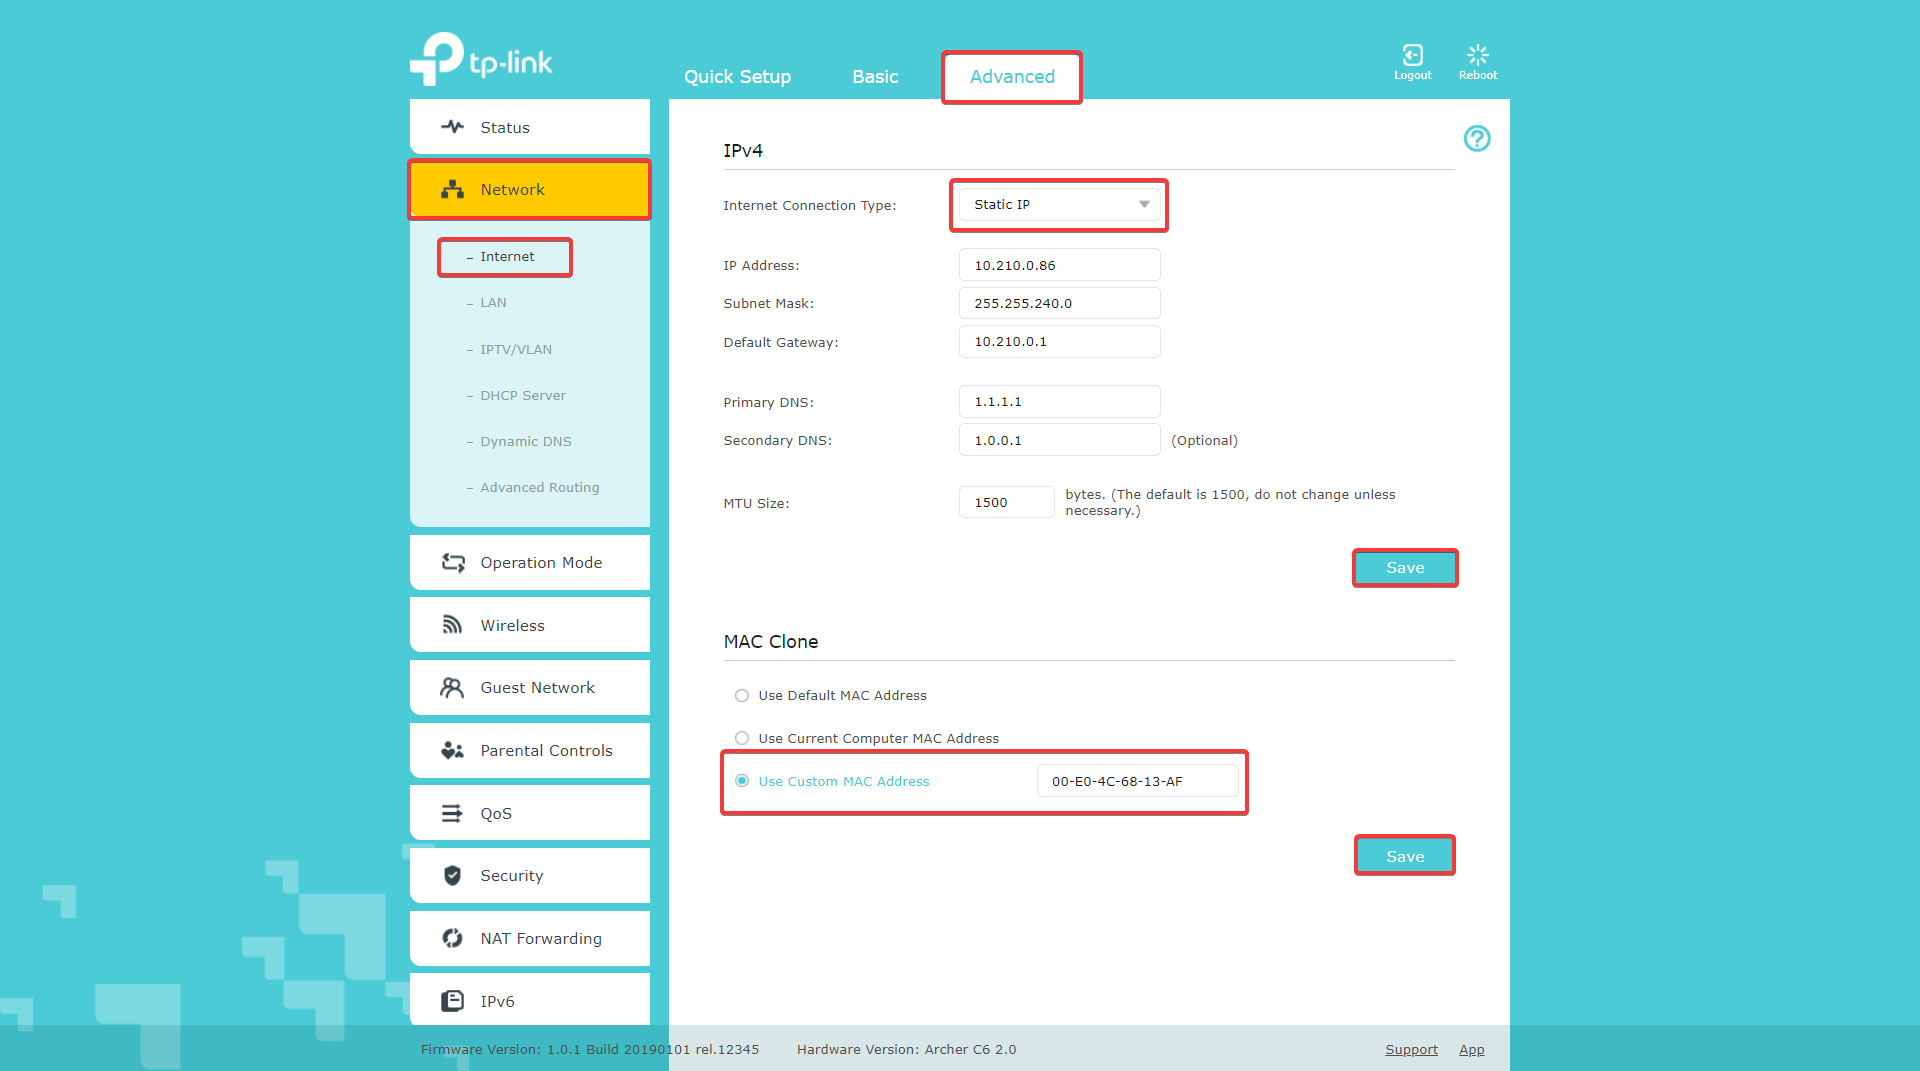](https://docs.ciurix.ro/uploads/images/gallery/2025-10/LXsimage.png)Once you have pressed **Save**, if you are on WI-FI, you can now safely unplug the cable from your laptop and plug it in the **WAN** port of the router or if you have unplugged it earlier, you can now plug it in the **WAN** port.
[](https://docs.ciurix.ro/uploads/images/gallery/2025-10/sTWimage.png)***Authentication on the router can take up to 1 minute so be patient!***
***Congratulations! You have successfully configured your router and now have internet connection! If you still have no connection I would advise you to read the this guide (Work in Progress) or contact me. mirceaciuraru@gmail.com / 0750269469***